This tutorial walks you through a complete first project in LEDEdit Pro 2026 — from an empty project to a .led file on your controller’s SD card. It takes about 15 minutes, and every step uses the real menus of the app.
What you need: LEDEdit Pro 2026 installed and activated on a 64-bit Windows PC (install & activation guide), your LED layout as a DXF file or a rough idea of how your pixels are wired, and an SD card for your controller.
The workflow in one sentence
Create a project → map your LEDs → add layers → put effect, text, image or video clips on the timeline → check the per-LED preview → export .led to the SD card.
Step 1: Create a project
When LEDEdit Pro starts, the Open Project screen lists your recent projects. Click New Project to start fresh, or Open File… to load an existing one.

Each project gets its own folder with the project file, the layout and an exports folder, so everything for one installation stays together. File → Open Project Folder takes you there at any time.
Tip: In Tools → Settings you can set the default frame rate, the default canvas size, auto-save and the interface language before you begin.
Step 2: Map your LEDs
The editor needs to know where every pixel sits and in which order it is wired. You have two options in the Layout menu:
- Import DXF Layout… — load a LEDEdit/DXF layout you already have.
- Open LED Layout Creator… — draw the layout yourself.

In the LED Layout Creator you set the canvas size and the max LEDs per port, add ports, build LED grids with serpentine or linear wiring, and let Layout Check confirm the result (“Ready: 2328 LEDs across 8 port(s)”). When it looks right, click Push to Editor. The full walkthrough is in LED pixel mapping with the LED Layout Creator.
Step 3: Add layers and paint where they play
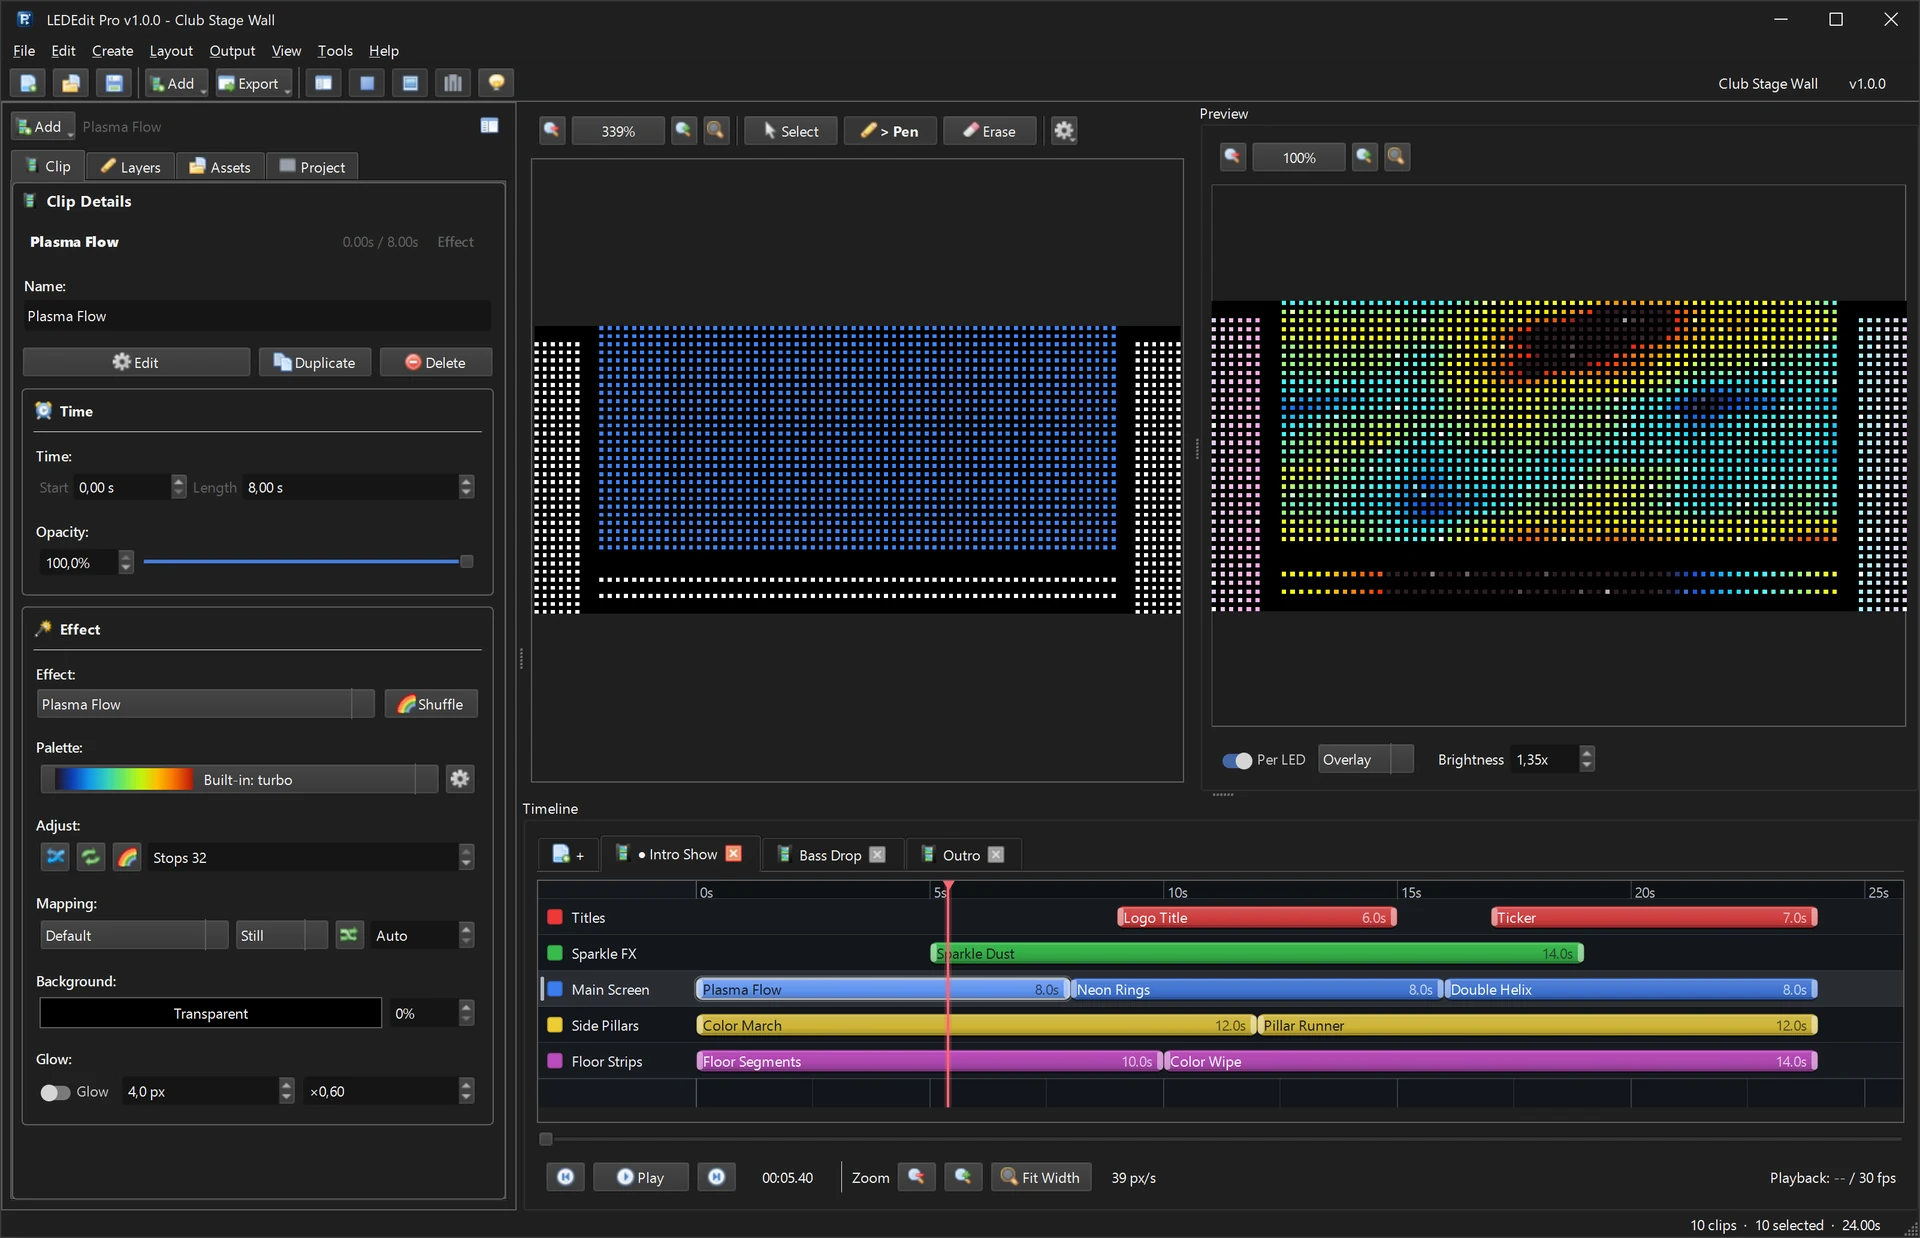
Layers decide which LEDs a piece of content drives. A typical stage might use one layer for the main screen, one for side pillars and one for floor strips.
- Choose Create → New Layer (or New in the Layers tab).
- Select the layer, pick Pen on the paint canvas and paint over the LEDs this layer should cover. Erase removes LEDs from it.
- Give each layer a clear name — you will see those names on the timeline.

Each layer has its own visibility, opacity and lock, so you can hide parts of the show while you work on others.
Step 4: Put clips on the timeline
Select a layer, then open Create → Add Clip. There are four clip types:
- Effect Clip… — one of the 151 generated LED effects.
- Text Clip… — titles and scrolling tickers (text guide).
- Image Clip… — logos and graphics (PNG, JPG, BMP, WebP, GIF).
- Video Clip… — MP4, MOV, MKV, AVI or WebM footage, or XDAT/TOL LED animations.
New clips land at the playhead. Drag them to move, drag the edges to change length, and use the Clip tab for exact start time, length and opacity. Click Edit to open the effect settings, where you can search all 151 effects, change the palette, speed and glow, or press Shuffle for a quick variation.

Step 5: Preview every LED
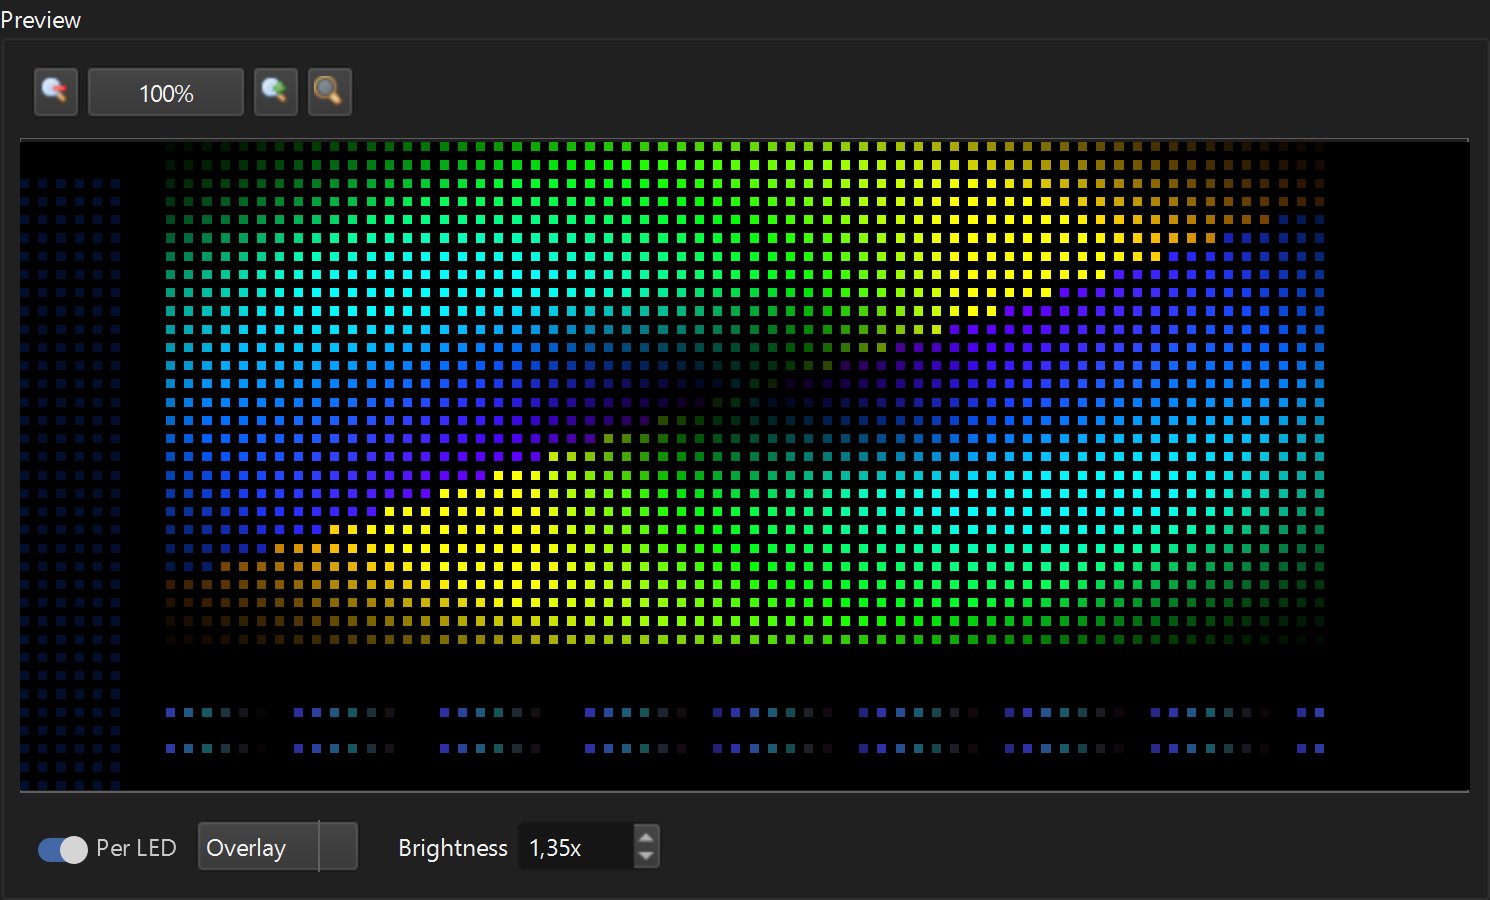
The Preview panel shows the frame sampled onto your real LED positions when Per LED is on. Switch between overlay and LED-only views and raise the preview brightness if your content is dark.

Useful playback keys: Space play/pause, Left/Right one frame, Home/End start and end of the timeline.
Step 6: Split the show into scenes (optional)
Click the + tab above the timeline to add a scene — for example Intro, Bass Drop and Outro. Each scene has its own clips. When you export a video you choose the current scene, all scenes or a selection, and the .led preflight shows how many scenes go into the package. More in multi-scene LED shows.
Step 7: Export to the SD card
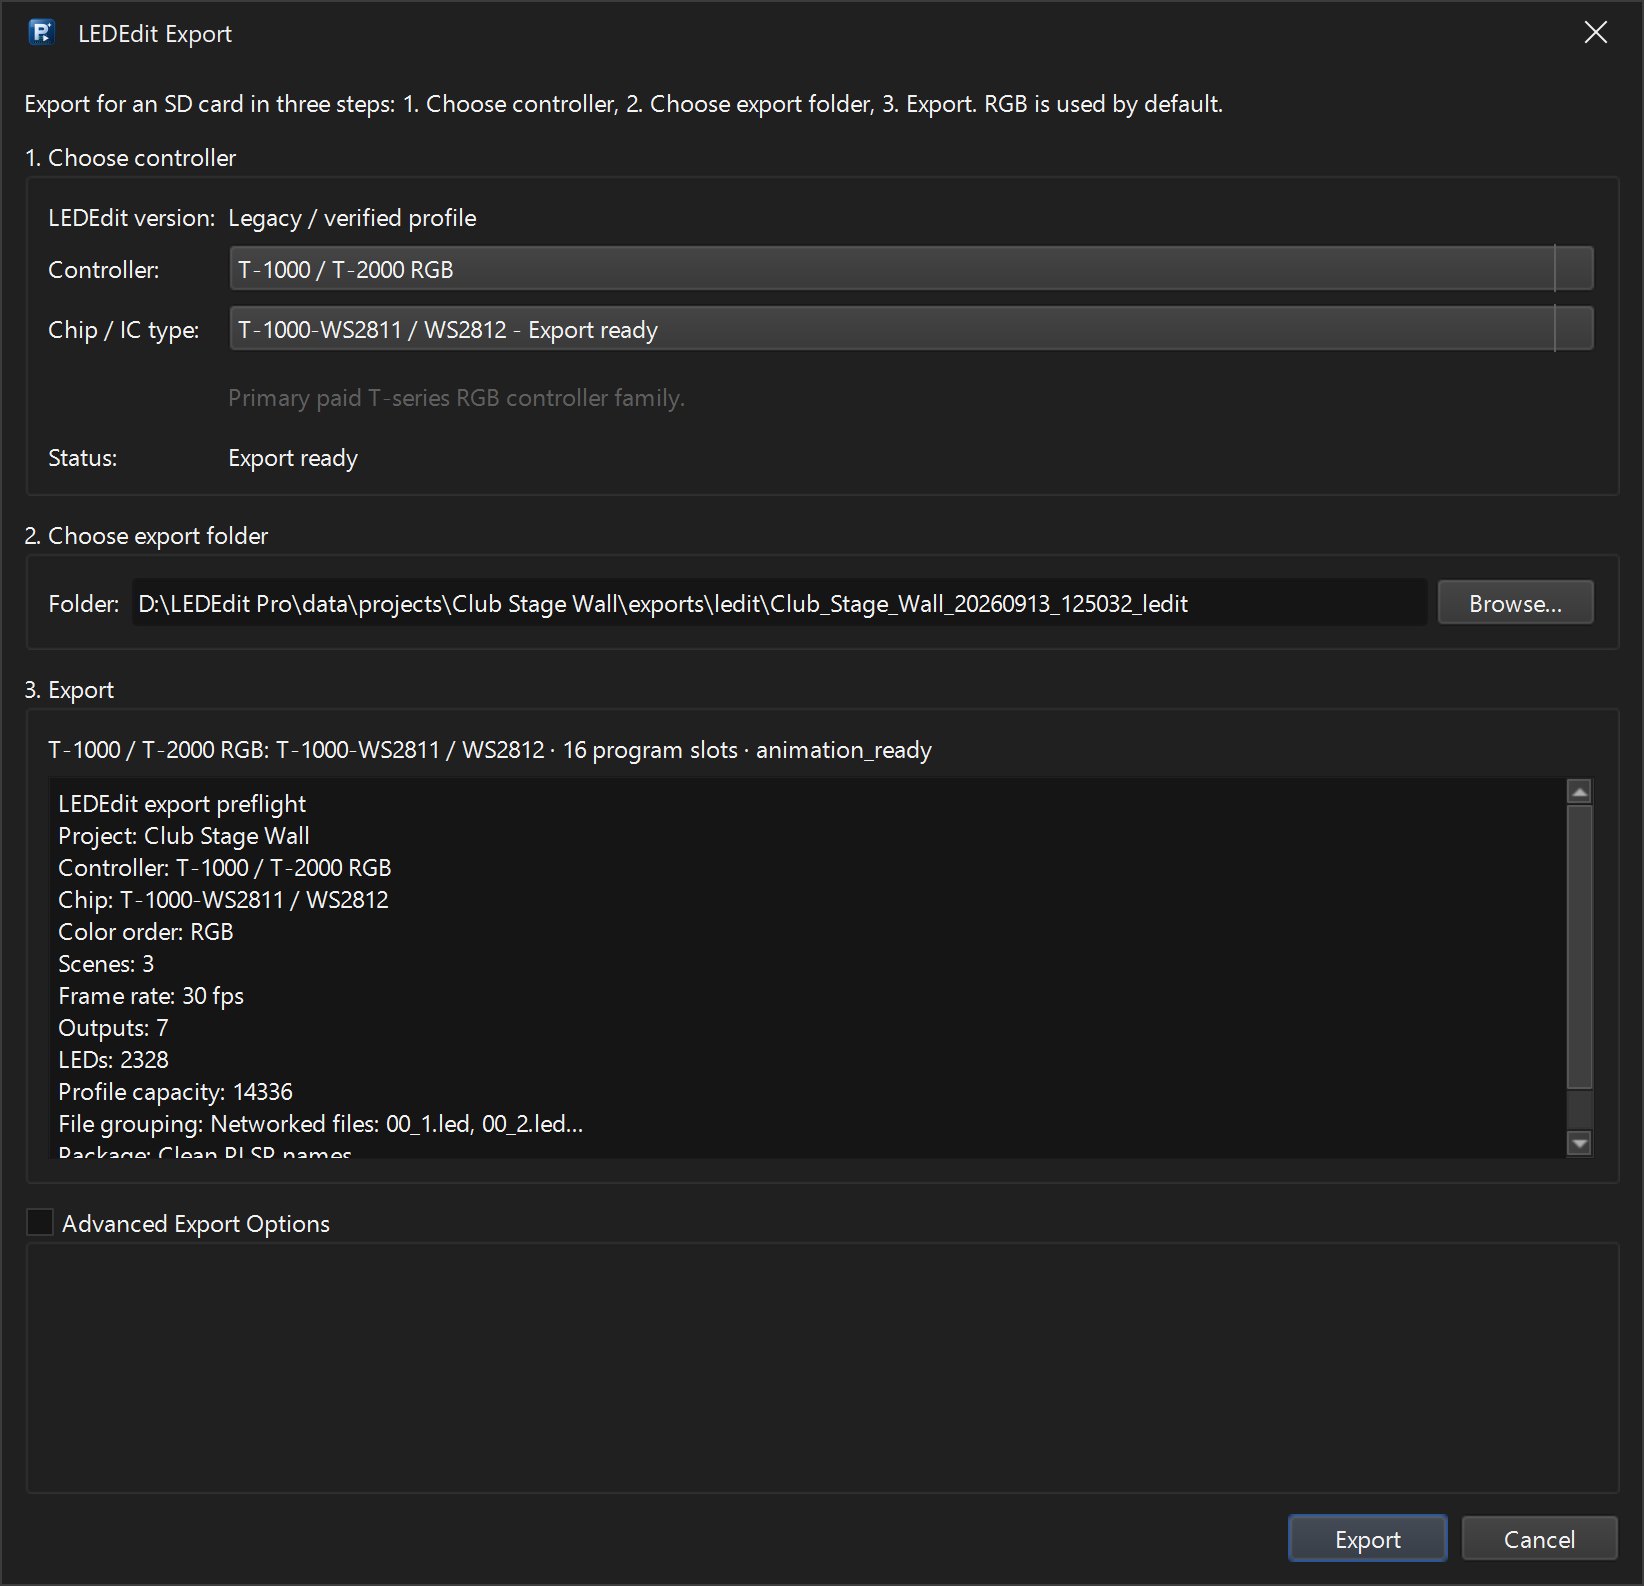
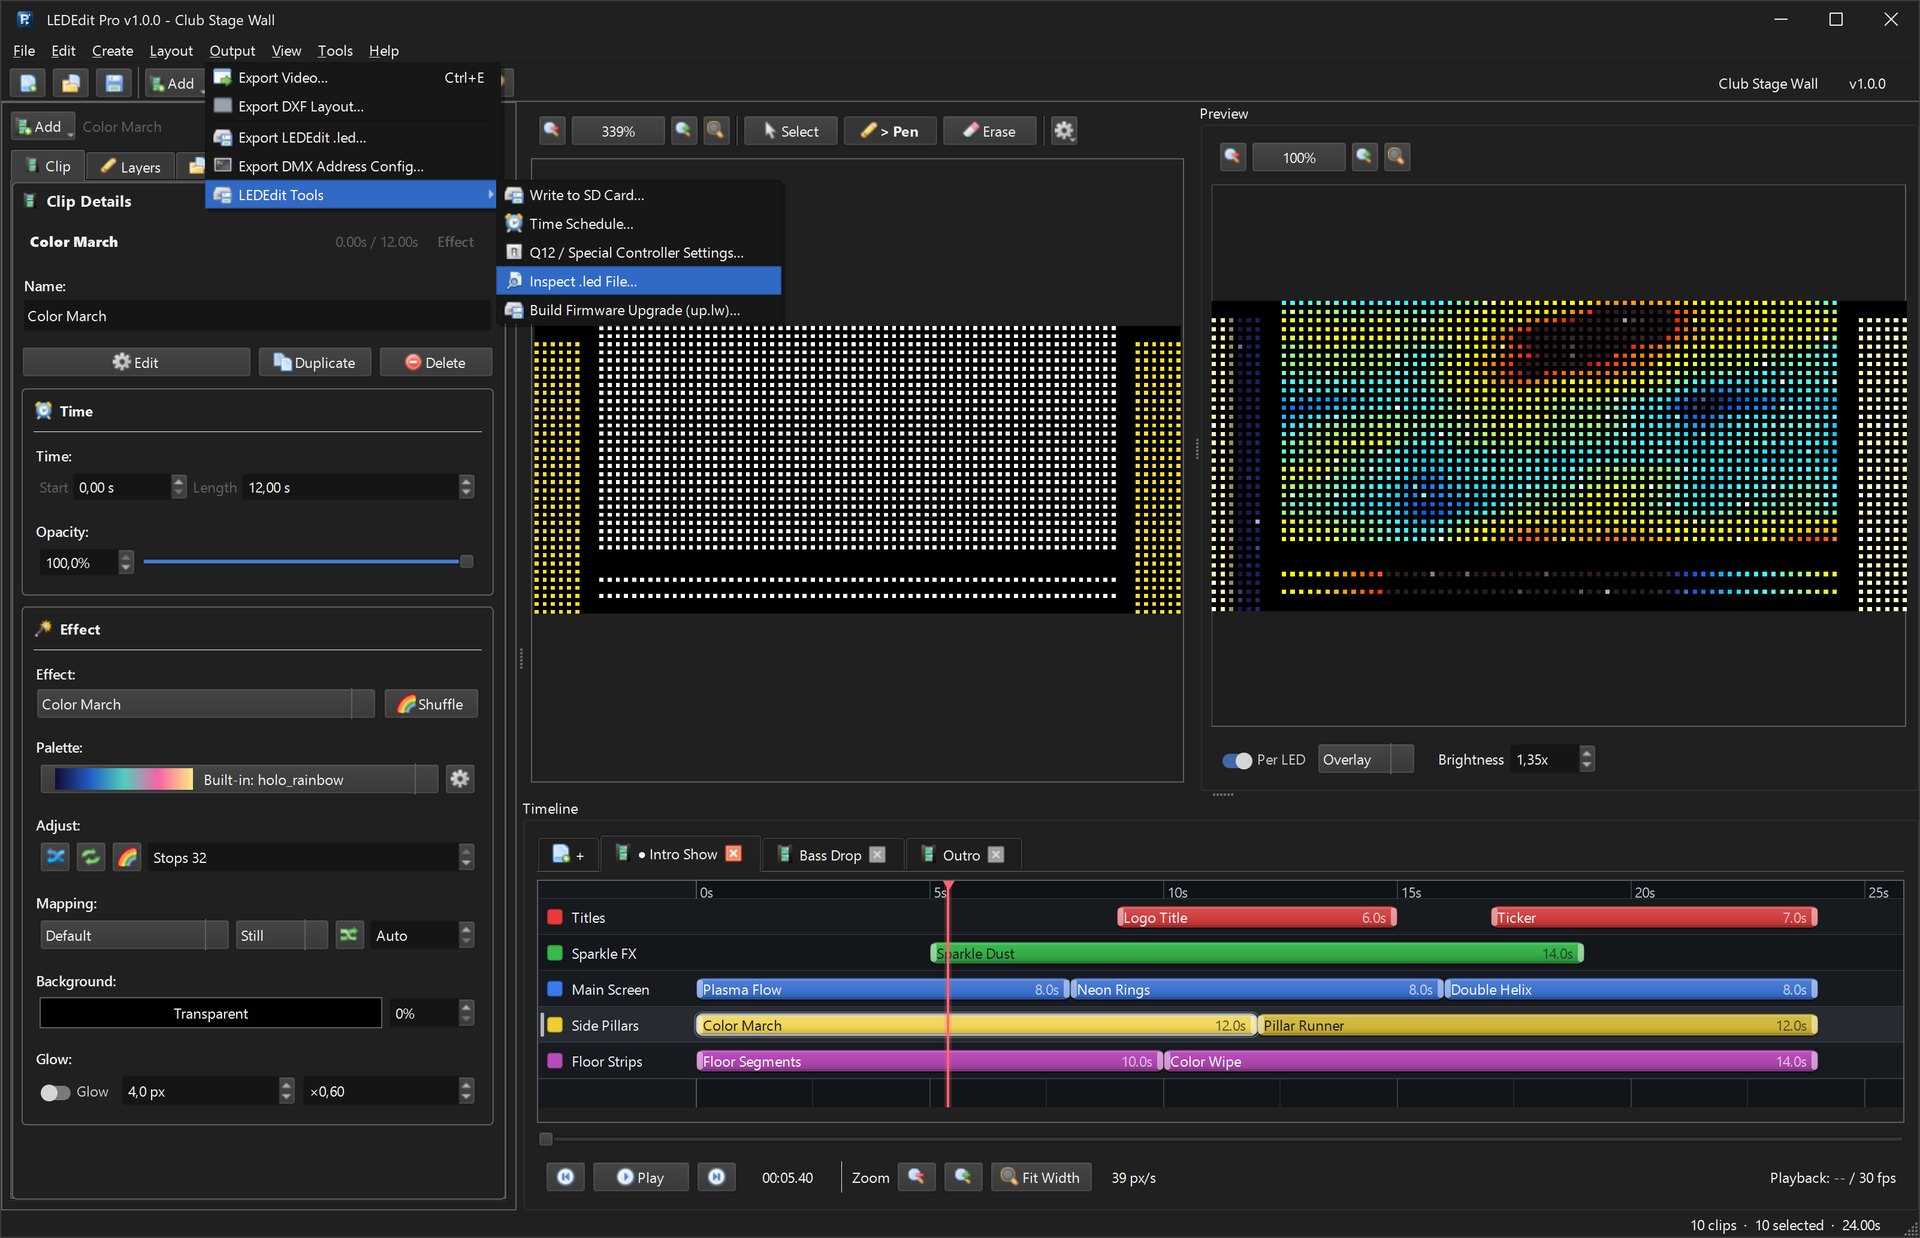
Save with Ctrl+S, then choose Output → Export LEDEdit .led….

- Choose controller — the controller family and the chip / IC type of your pixels. The status line tells you when the combination is export-ready.
- Choose export folder — by default inside the project’s
exportsfolder. - Export — the preflight summary lists project, controller, chip, colour order, scenes, frame rate, outputs and LED count before anything is written.
Finally copy the files to the card, or use Output → LEDEdit Tools → Write to SD Card… to copy the exported package to your SD-card folder.
Controller does not play the file? Check controller family, chip type and colour order first. If it still does not work, export DXF + AVI and build the file in free LEDEdit — see the fallback guide.
Keyboard shortcuts worth learning
| Shortcut | Action |
|---|---|
| Ctrl+N / Ctrl+O / Ctrl+S | New, open, save project |
| Ctrl+E | Export video |
| Space | Play / pause |
| Ctrl+C / Ctrl+V / Ctrl+D | Copy, paste, duplicate clips |
| Ctrl+Z / Ctrl+Y | Undo / redo |
| Ctrl++ / Ctrl+- / Ctrl+0 | Zoom timeline in, out, fit |
| B, E, R, C, V, G | Pen, eraser, rectangle, ellipse, select, fill on the paint canvas |
| F1 | Keyboard shortcut reference |
Where to go next
- LEDEdit Pro 2026 vs free LEDEdit — what changes when you upgrade
- Supported controllers and chips — check your hardware
- 151 LED effects and 149 palettes — the effects guide
- LEDEdit Pro 2026 feature tour — every feature with real screenshots